
If you’re not familiar with moringa, it’s referred to as the “miracle tree” because of its wide range of nutritional, medicinal, and purifying properties. It’s also called a “superfood” because of its awesome potential to improve health and eliminate hunger around the world.
Not only is moringa a significant source of vitamins, minerals and anti oxidants, it’s a great source of plant protein. For every 100g of moringa leaf powder there’s 30g of protein. The leaves of the moringa tree contain 18 amino acids, 8 of which are essential amino acids, making them a “complete” protein. This is a rare find in the plant world.(But not in the steak world!)
If you’d like to learn more about the health benefits of moringa or how to grow it, check out the Moringa Oleifera entry in our plant database.
MORINGA POWDER?
While the leave and pods are excellent raw, moringa powder is an even more concentrated source of vitamins and nutrients.
According the UN FAO,
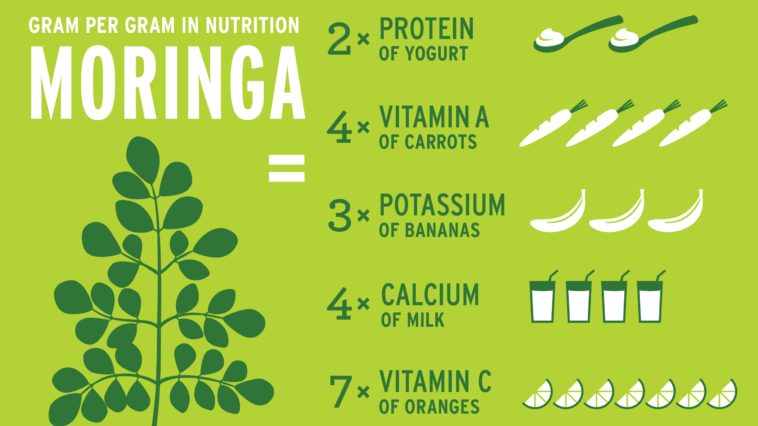
Recent research has revealed that moringa leaf powder may contain seven times the vitamin C content of oranges, four times the vitamin A content of carrots, and three times the potassium content of bananas. People often lack in vitamin C and have to use a vitamin C powder to get the nutrients their body needs. This plant can help them boost all of their vitamins and increase nourishment. When added as a supplement to a child’s diet, just 25 g of the leaf powder reportedly supplies all the calcium and vitamin A daily needs, about half the protein and potassium daily needs, and about three-quarters of the iron daily needs.
Making moringa powder involves cutting and drying the leaves, then grinding them into a powder. It’s a great nutritional staple to keep in the house and easy to store long-term.
Or continue on reading below if you have a Moringa tree ready to chop, dry and grind.
MAKING MORINGA POWDER – STEP BY STEP!
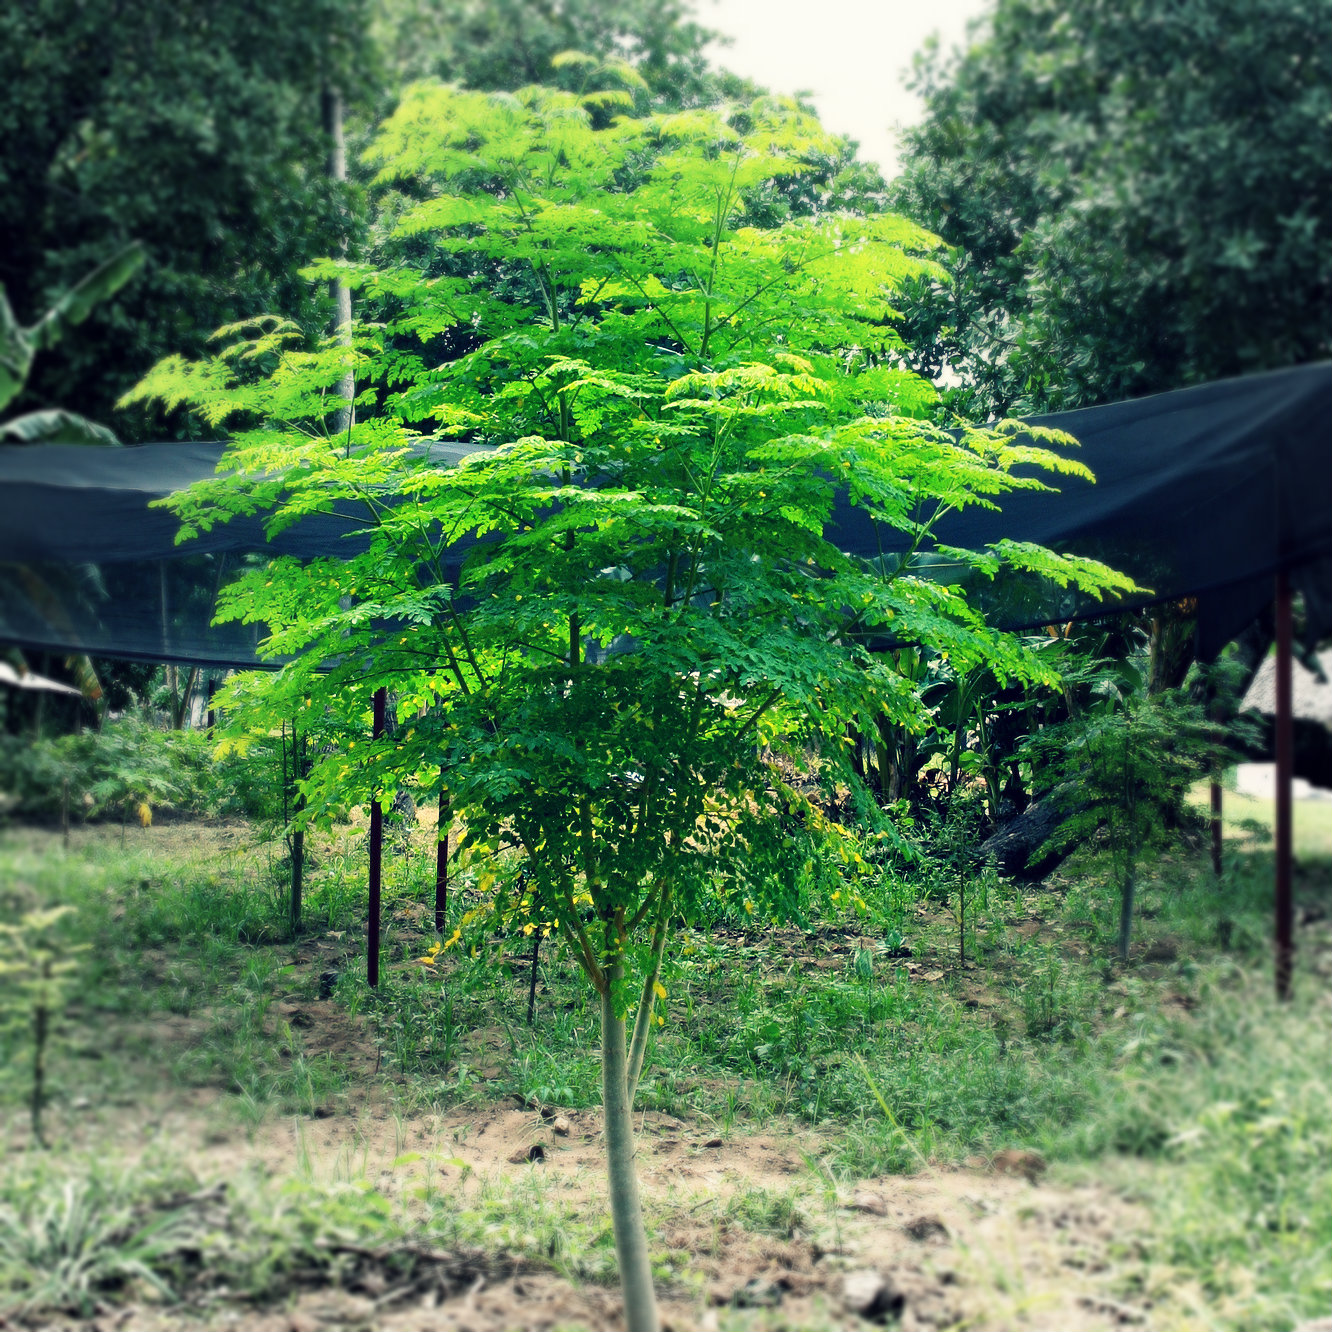
1. WHEN YOUR MORINGA TREE HAS GOTTEN NICE AND TALL AND HAS A SIGNIFICANT NUMBER OF BRANCHES, CUT THE MAIN TRUNK OF YOUR MORINGA TREE DOWN TO ABOUT 1 METER HIGH. THIS WILL KEEP THE TREE BUSHIER AND EASY TO HARVEST IN THE FUTURE. (DON’T WORRY, CUTTING IT SHORT WON’T KILL IT!)
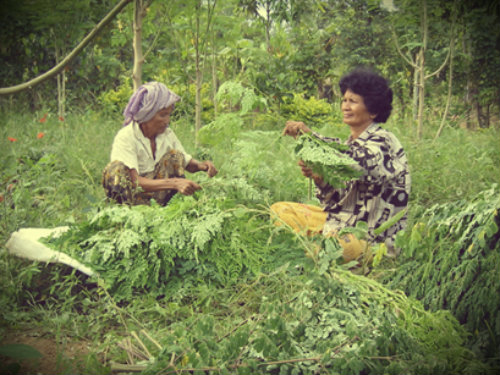
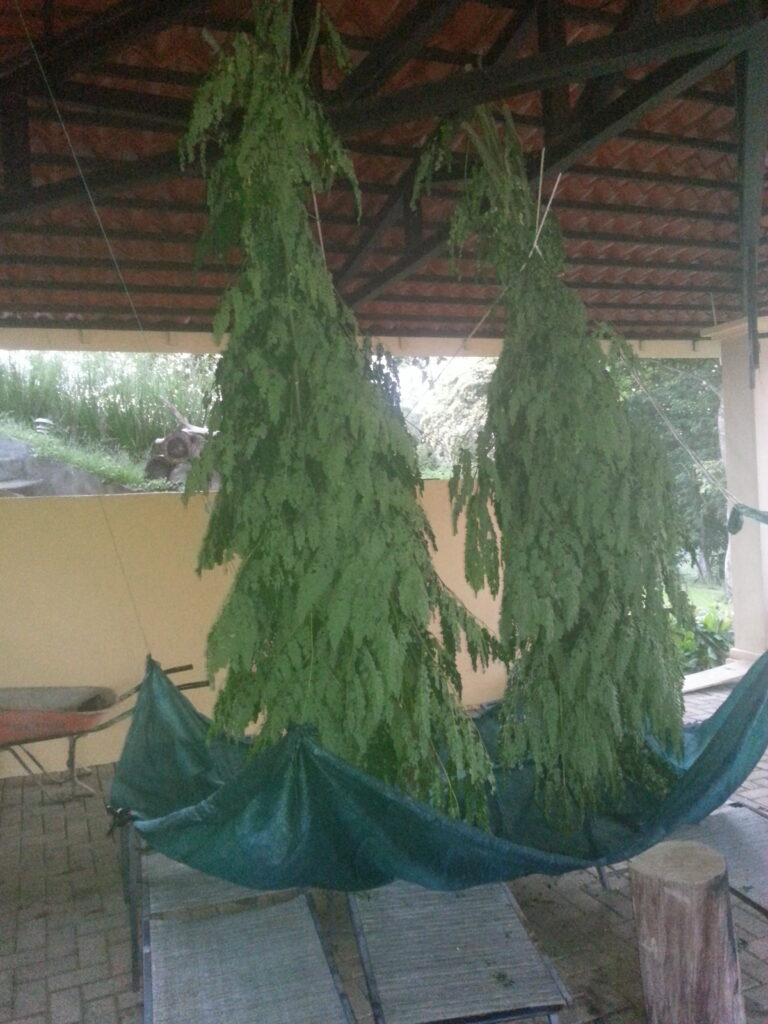
2. COLLECT ALL OF THE BRANCHES INTO A PILE. TIE THEM TOGETHER AT THEIR BASE AND HANG THEM. SPRAY THEM DOWN WITH WATER TO GET ANY RESIDUAL DIRT OFF. LET THEM DRY, BUT KEEP THEM OUT OF THE SUN!
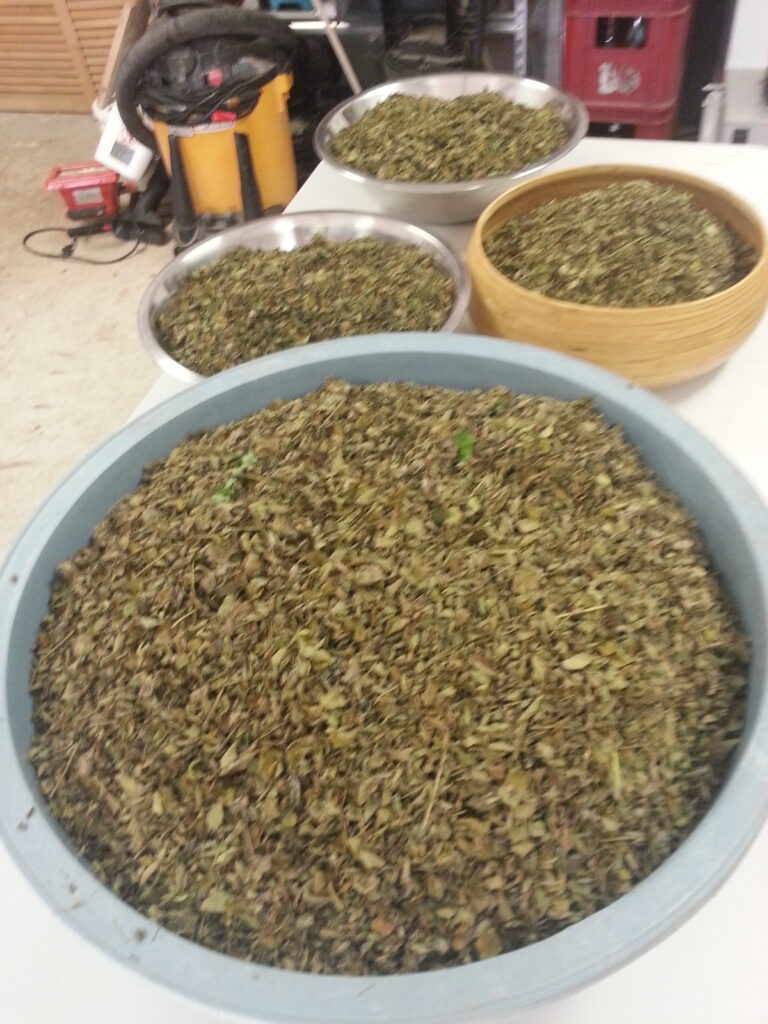
3. COLLECT THE DRIED MORINGA LEAVES INTO BOWLS OR ONTO A SHEET. HINT: MINIMIZE THE AMOUNT OF SMALL STICKS IN THE MIX, IT WILL MAKE FOR A SMOOTHER POWDER.
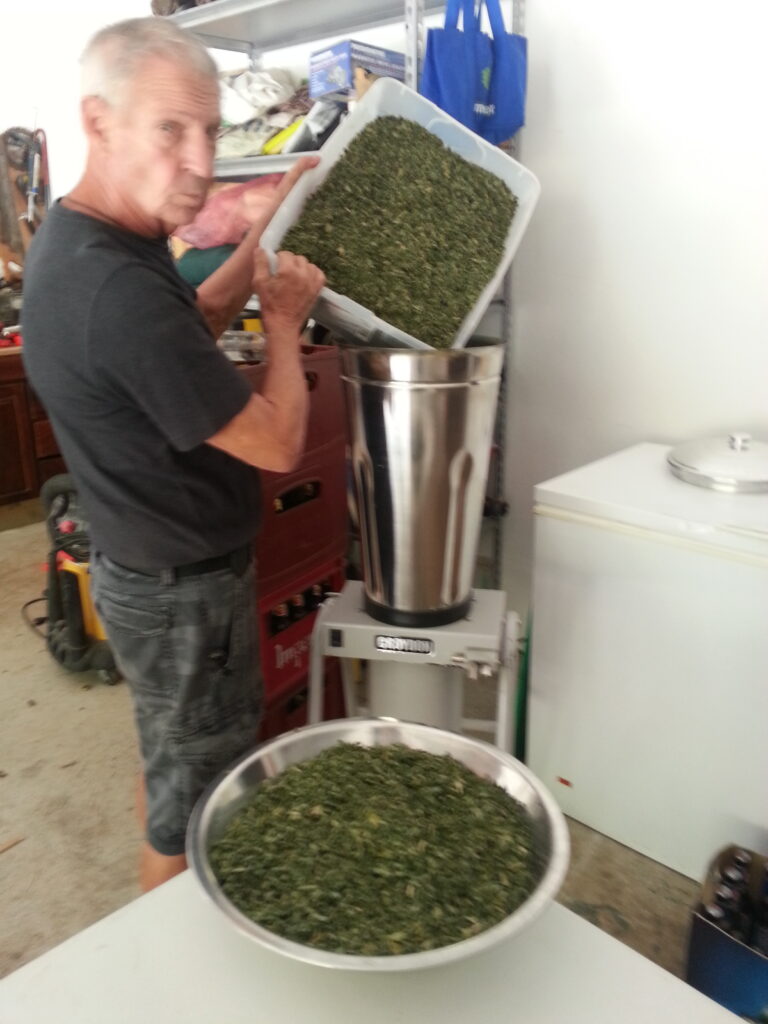
4 . PLACE LEAVES IN BLENDER OR GRINDER UNTIL THE DESIRED CONSISTENCY IS ACHIEVED.
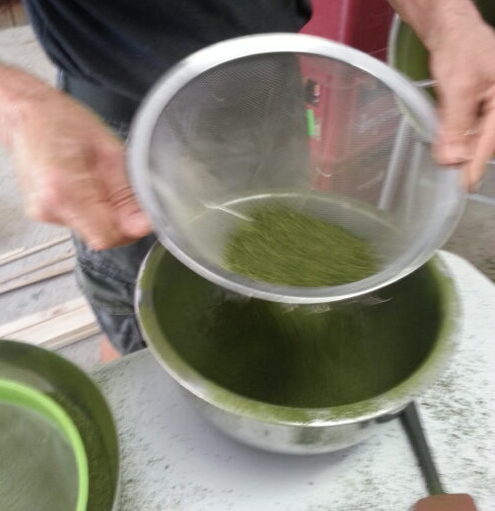
5. USE A STRAINER TO SIFT OUT ANY UNWANTED STICKS AND LARGE MATTER.
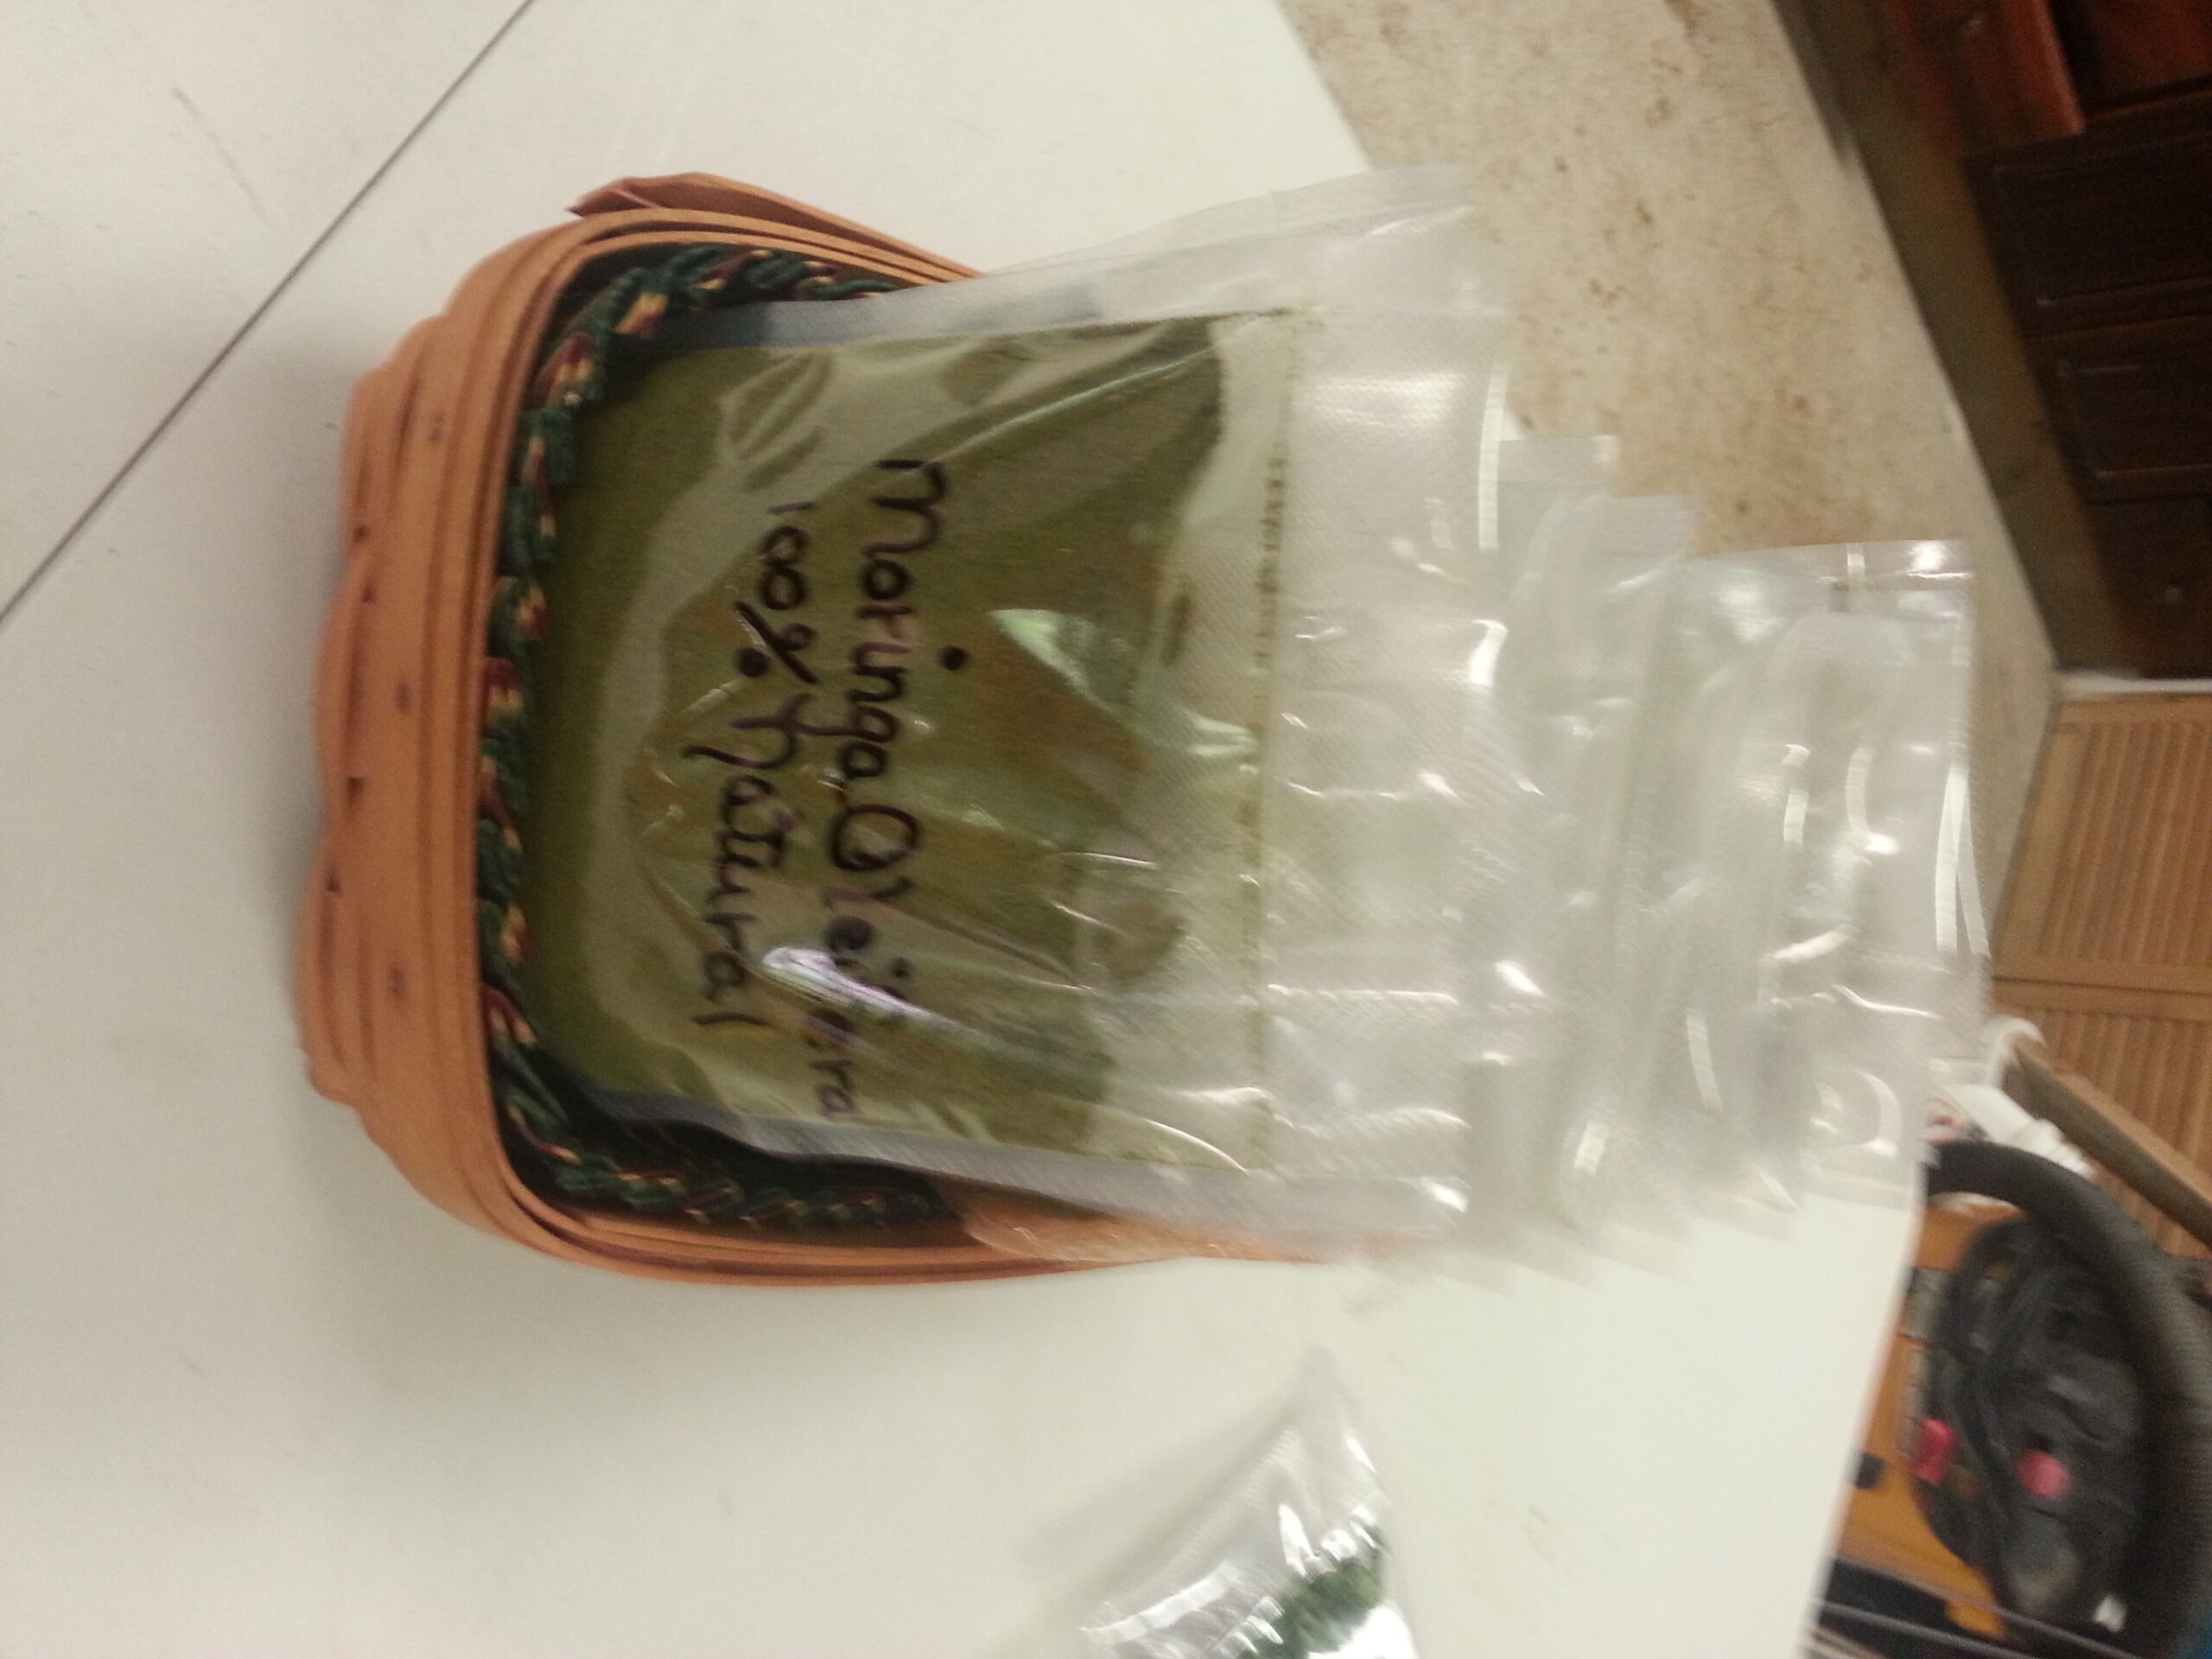
Now you can put your moringa powder in containers or ziplocks. We like to use a vacuum sealer. Be sure and store your prized moringa in a dark cool spot to minimize nutrient breakdown.

GIPHY App Key not set. Please check settings