What are raised beds?
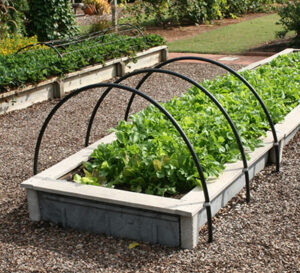
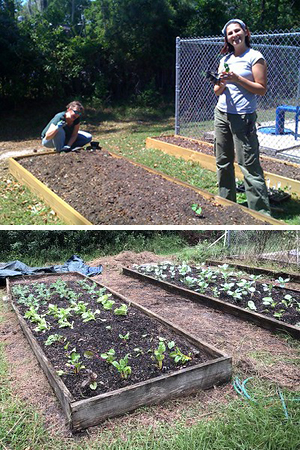
Raised beds are freestanding garden beds constructed above ground level. “Raised” means that the soil level in the bed is higher than the surrounding soil. The word “bed” implies a size small enough to work in without actually stepping onto planting area. Often raised beds are enclosed with box-like frames to provide structural support and prevent erosion.
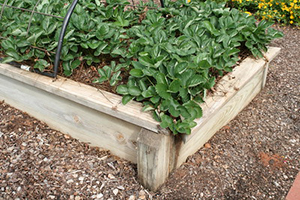
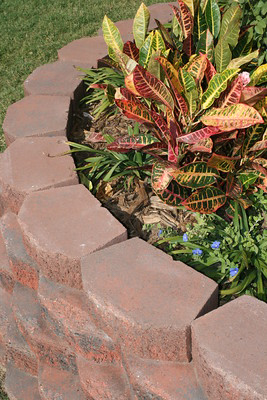
Frames for raised beds can be constructed using a variety of materials, including brick, rot-resistant lumber, landscape timbers, or concrete blocks. Beds can also be elevated for gardeners who want to avoid bending to the ground while working.
Benefits
Besides being aesthetically pleasing, raised vegetable beds offer many benefits to gardeners. Here are a few:
Improved Soil Conditions — Florida soils tend to be sandy and low in organic materials. By adding garden soil, compost, and soilless media to your raised bed, you can keep the soil full of the nutrients plants need. Since you don’t walk in raised beds, soil compaction is also reduced. This allows water and air to move more freely through the soil.
Higher Yields — Raised-bed vegetables can be planted at higher densities, just far enough apart to avoid crowding but close enough to shade out weeds. The result is more produce per square foot. If your raised bed is elevated above the ground, you’ll also have fewer problems with nematodes. These microscopic worms wreak havoc on a plant’s roots and reduce yields.
Enhanced Accessibility — Raised beds offer options to gardeners with decreased mobility. Because the soil level is higher, you stoop less to weed, water, and do other garden chores. Elevating the raised beds one to three feet high makes gardening possible for people with limited mobility. Make sure you have wide, hard-surfaced paths in between beds to provide safe access for walkers and wheelchairs.
Decreased Maintenance — Since vegetables are planted much closer together than they would be in a traditional bed, they can shade out much of the weed growth. Pest control is also easier with raised beds. If burrowing rodents like moles are a problem, the bottom of the bed can be lined with poultry wire or hardware cloth. You can even cover beds with bird netting. The narrow dimensions of the beds make it easy to add an overhead frame. The frame can also be used to support covers for frost or freeze protection.
Water Conservation — Raised beds can be irrigated using canvas soaker hoses, perforated plastic sprinkle hoses, or low-volume drip tubing. These irrigation methods work well for dispersing water in the long, narrow beds. They also reduce disease by directing water to the soil instead of wetting leaf surfaces with overhead irrigation.
There is one caution to building raised beds, however. Products and building materials used for ornamental plants may not be suitable for edibles. Be cautious of recycled lumber as a building material. Please also remember that not all pesticides are safe for vegetable gardens. Many of the products you would normally use in ornamental beds can be dangerous when used on edible crops. Always read and follow the instructions on the label; it’s the law.
What to Plant in Raised Beds
Most garden vegetables will grow well in raised beds. Try growing lettuce, greens, radishes, and strawberries. Bush type vegetables, such as tomatoes, cucumbers, and beans also do well in raised beds. You can install trellises for vegetables that need support, like some tomatoes and beans. Certain crops, like squash, melons, and sweet corn, usually do better in the ground because they require more space than other vegetables.
If you’re interested in adding raised beds to your yard, we have more information for you. For construction tips and steps, please read our article, Building Raised Beds. You will also find the Florida Vegetable Gardening Guide helpful. This guide includes vegetable varieties, planting dates in Florida, and other valuable information on edible gardening.
Maintaining Your Raised Beds
One of the benefits of gardening in raised beds is the easier maintenance. If you use quality materials and construct them well, raised beds can last for decades with very little structural maintenance. There are a few standard maintenance practices that you will need to keep up with, though, for your crops’ sake.
Water Regularly

Soil in raised beds warms faster and dries out more quickly than soil at ground level. Remember to water your raised beds on a consistent basis, especially during dry periods. The goal is to keep the soil underneath the surface lightly moist, even when the top inch dries in the sun.
Place soaker hoses or drip irrigation directly on the bed if you plan to use them. Overhead sprinklers can also be used, but because they get the plant foliage wet, they are more likely to spread disease. And of course, watering cans are still an effective way for gardeners to get regular exercise.
Use Mulch
Mulch helps to suppress weed growth and keeps the soil moist. Soil temperatures are also much lower under organic mulches. You can use organic mulches, such as straw (hay) or wood chips placed on landscape fabric. Be cautious when using pine straw or bark as these may acidify the soil.
Fertilize Appropriately
Fertilization of plants grown in raised beds is similar to that of plants grown conventionally. We usually suggest that you select something with 2% phosphorus or less, in accordance with Florida State Law, but edibles are the exception. Still, you may not need extra phosphorus in your vegetable garden; a soil test can help you determine which nutrients you truly need. You can learn more in our article about fertilizing vegetable gardens.
Till at the End of the Season
At the end of the growing season, you can till your vegetable plants back into the beds. This adds organic matter to the soil. You can also add additional compost for more nutrients. Over time, the soil may become so improved that you won’t have to till under.
Building Raised Beds

Home food production is a growing trend in Florida gardening once again. There’s a new wave of gardeners who are hoping to grow their own food and live a more sustainable lifestyle.
Gardening in raised beds can help improve yields and reduce maintenance in your home vegetable garden. Here we will walk you through the steps to build raised beds. For more on caring for your beds and plants, see our article Raised Beds: Benefits and Maintenance.
Materials and Construction
While raised beds do not technically need a framework, we do recommend one for long-term gardening. Frames can be constructed using a variety of materials, including brick, rot-resistant lumber, landscape timbers, and concrete blocks. Beds can also be elevated for gardeners who want to avoid working at ground level.
Generally, wood-based products are less expensive than stone or masonry materials. Sometimes it is possible to get building materials secondhand at little or no cost. While recycled lumber is not a good choice for edible gardening, used bricks, concrete blocks, and other recycled materials are an option. To tie your landscape elements together, match your raised-bed materials to other materials used in your landscape.
Here are some popular materials used to construct raised beds:
Wood / Lumber
- Untreated lumber – begins rotting within a year, but it is safe for edibles
- Naturally rot-resistant lumber – examples include redwood or cedar
- “ACQ Ground Contact” treated lumber – approved by the Food and Drug Administration for food production
- Synthetic lumber – made of recycled plastic
Other Materials
- Brick or stone – long-lasting but often expensive
- Large, grouped containers – examples include half-barrels and large terracotta pots
- Concrete blocks – may result in an alkaline soil pH but the effect will decline over time
- Poured concrete – check that curing compounds, stains, sealers, and release agents are safe for use in edible gardening; as with concrete block, an alkaline soil pH may result
Cautions for Vegetable Gardeners

Whether you are a new or an experienced vegetable gardener, a cautious approach to edibles is wise. Products and building materials you might use for ornamental plants are not always suitable for edibles.
Many of the pesticides you would normally use in your ornamental beds are not safe for edible crops. Always read the label; it’s the law. When in doubt, contact your county Extension office for assistance.
Avoid the use of secondhand lumber, such as that from pallets. Some lumber is treated with creosote or pentachlorophenol. These chemicals can leach out and injure plants.
Avoid recycled landscape timbers and railroad ties. Prior to 2004, these may have been treated with compounds that contain arsenic. New lumber is no longer treated with those compounds.
If you’re uncertain about the safety of treated lumber, place a heavy plastic liner between it and the soil used for growing plants. This will prevent direct contact of plant roots with the treated lumber. Be careful not to tear the plastic when tilling.
Construction Tips for Raised Beds
Raised beds can be as simple or as elaborate as you’d like them to be. Here are some general steps for constructing the frameworks.
Step 1: Choose a spot in your landscape that receives 6-8 hours of direct sunlight a day. The most convenient sites are flat and located near a source of water. If the area is part of an existing lawn, remove the top layer of grass or cover the turf with recycled cardboard, or black and white newspaper.
Step 2: Measure your site and determine the size and placement of your raised beds. Here are some guidelines:
- Width – Beds should be no wider than 4 feet. In larger beds the center can be difficult to reach.
- Length – Eight feet is a common length, but there is no one-size-fits-all for raised beds. The length should match your site and budget.
- Depth – The depth of the bed should be between 6 and 24 inches deep. Deeper beds are more expensive because they require more materials. Shallower beds cost less, but may be more difficult to access. If you want the surface of the bed to be higher than 24 inches, consider elevating the entire bed above ground level. Add a sturdy bottom, with drainage holes.
- Spacing – Leave a walkway of 18 inches or more between the beds for weeding and harvesting. Wider walkways will make the beds more accessible. For wheelbarrow access, we recommend leaving 3 feet between beds.
- Orientation – A north-south orientation is best for low-growing crops. This allows direct sunlight to reach both sides of the bed. Beds that will contain taller crops do best with an east-west orientation. This is appropriate for plants such as pole beans and caged tomatoes.
Step 3: Once you know how big the beds will be, list the materials you’ll need and purchase accordingly. A materials list and detailed instructions for building a 4′ x 8′ x 21¾” wooden framework can be found in the publication Gardening in Raised Beds.
Step 4: Construct your beds and place them in the landscape. Measure the space between them and check that they are accessible before you continue. If weeds have been a problem on the site, line the bottom of the beds with 4-5 layers of newspaper or cardboard to create a weed barrier.
Step 5: Fill the beds with high-quality garden soil or with soilless media. Using new media rather than soil from your landscape will help the plants thrive. You’ll also get a fresh start in the battle against weeds. This is also a good time to till in organic soil amendments, such as compost or manure.
Step 6: Add your edibles! Most garden vegetables will grow well in raised beds. Still, seasons matter. Cool-season crops require cool weather, even in raised beds. Plant the vegetables appropriate for the current growing season. You will find the Florida Vegetable Gardening Guide helpful in choosing vegetable varieties for our state. This guide also includes planting dates for your region and other valuable information on vegetable gardening. For more on caring for your beds and plants, read Raised Beds: Benefits and Maintenance.
Credit to: University of FL Gardening Solutions


GIPHY App Key not set. Please check settings